

The teacher toolbox was all over Pinterest a couple of summers ago, but I don't see them as much anymore. This is a tried and true mess-saver that I've been using in my classroom for three years now. I can't imagine what I did without it. (Actually, I can, and it wasn't pretty!) If you haven't made one yet, make this one of your summer projects! I actually have two teacher toolboxes in my classroom. One holds all of my office supplies, and the other organizes our Brag Tags.

The first time I made a teacher toolbox, I followed the Pinterest instructions to a T, using double sided tape to stick my labels inside the toolbox drawers. It worked ok for a while, but by the end of the year, I had this... (Yuck!)

I brought my toolbox home over the summer, made new labels, and gave my poor, sad toolbox a makeover. This time, it worked wonderfully, and I have used the same toolbox for two years without any labels falling off! The answer - Mod Podge! Here's the step-by-step on how I did it:
1. Hairspray! This is a must-do step. Do not skip it or your ink will bleed! Before you cut out your labels, spray the printed side of the entire sheet with a light coat of aerosol hairspray. This seals in the ink so that it doesn't bleed when it gets wet. I just used whatever I had in the bathroom, so I don't think brand matters.
2. Cut out your labels. Thank goodness for a quality paper cutter!

3. Mod Podge. Paint a thin, light coat of Mod Podge on the printed side of the label. Work on only one label at a time so that it doesn't start to dry. Use a piece of cardboard or something similar to paint on so that you can go all the way to the edges. (As you can see, I grabbed an old envelope that I was about to throw away!)

4. Press your label into the drawer. Don't worry if it doesn't go in straight on the first try, you have a couple of minutes to reposition the label before it starts to dry. Just slide the label around with your fingertips until it is nice and centered.
5. Repeat the process with all of your labels, and let it dry.

When you're ready for a new look or need to change out a label, just peel it off from inside the drawer. The Mod Podge makes it peel off clean with no goo left behind. And it lasts! My toolbox from 2 years ago is still going strong. I'd love to wait and find out how long it will last, but we all know that teachers like to change up room themes too often for that! This toolbox will probably see a makeover this summer.
*Freebie Alert!*
Here's a FREE set of labels so you can make your own toolbox! Grab it fast, because the link is only good for one week!
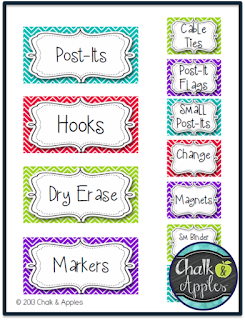
If you want to customize the items on each label or are looking for a different design, head over to my TPT store to check out all the options!


Where did you buy the toolbox and what size? I need this in my life! Thanks for the freebie!!!!!
ReplyDeleteGreat post! Thank you for sharing the most effective way to apply the labels. I'm planning on making one of these this summer and your tutorial will save me from having a big mess! I love all the designs that you have available. Thanks!
ReplyDelete~Melissa
Teacher Treasure Hunter
Thank you for sharing! I might actually try this in the coming weeks!
ReplyDelete