

1. Edit Digital Classroom Decor on PowerPoint
Many digital classroom decor packets will come with an editable PowerPoint and/or an editable .pdf. I love that I can add text to personalize the decor before printing.To edit a PowerPoint, you need to own PowerPoint first of all. Open the .ppt file and add text boxes to where you want to write. The background is usually "secure" so you can't change it. You can use whatever fonts you have installed on your computer.

When you are finished editing the .ppt, I strongly suggest you print it to a .pdf first before printing out onto paper. A .pdf has a higher resolution and will keep the size and spacing intact. So while it seems like an extra step, I think is worth the five minutes it takes!
If the packet you purchased does not have text boxes on the page, just click insert > text to add a box. I usually set up the one text book with the font, size, color, and justification I like, then I copy, paste, and drag it around the slide.
Another tip when editing classroom decor on PowerPoint is you can duplicate pages if you are printing multiples. When editing my Emoji Name Tags, I set up the text boxes then right clicked the slide and chose "duplicate" until I had a class set ready to enter in.

Finally if you ever need to just print one and do not want to waste the ink on blanks, I just click insert>shape and create white rectangles to cover the ones I do not want to print. Usually the default shape is blue so you will need to change the fill color to white.

2. Edit Digital Classroom Decor on Adobe.
If you are editing on a .pdf file, make sure you have it opened in Acrobat, not Adobe Reader. Some editable classroom decor I have used has worked in both but it varies. I usually click to view the form fields to I know what sections are editable in the document. Depending on the pack you have purchased, you may be able to change fonts or you will be limited to the font chosen for you.
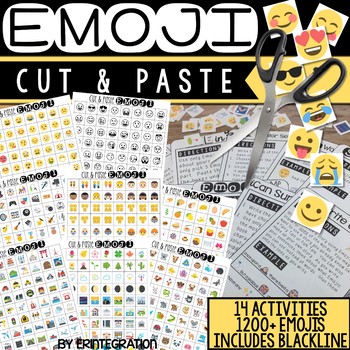
For my editable Emoji Bulletin Board Accent Piece, I clicked in the form field and typed the student names. The neat thing about Adobe editing is usually the seller will set up the form fields for you so you know they are spaced and sized correctly. Since the resource only comes with 22 Emojis, you will need to print the first 22 then type and print any additional ones you want next.
3. Laminate Digital Classroom Decor Then Use Wet Erase Markers
I have also printed digital decor blank onto white card stock to write in my info. I laminate it first so that I can write and wipe. I recommend wet-erase markers for this instead of dry erase markers as they erase with just water, but if you have the dry erase spray, then go for it. I use this method for things that change during the year like class schedules.
Here I typed in the subject but I used a wet erase marker to draw the clock hands. You could also have a student do this in the morning. The black clock times are separate rectangles that I pre-printed, laminated and tape onto the schedule as needed.
4. Print Digital Classroom Decor in Black Ink onto Colored Paper
Sometimes I want to save ink. Many digital classroom decor packs come with blackline. I print these onto my favorite Astrobrights paper.
If the packet did not come in black line, you can always select grey scale when in the .pdf print window.
5. Print Smaller Than Shown
Wall and bulletin board space is limited in my classroom. I usually print .pdf posters half sized that I have purchased. To do that open the .pdf. Select print. In the print window, you can change "how many per page." When printing smaller, you will want to play around with either the landscape or portrait option depending on how it was originally oriented. I do this a lot if I want to size down a poster to half size so I can fit more of them.

6. Print Over Multiple Pages
In the .pdf printing window you have the option of printing one over multiple pages. Make sure, if going this route, that the decor you purchased is sized appropriate so it won't get blurry if printing larger. You can adjust the scale - usually I use between 150% or 175% if I know my file can support the mark-up and not get blurry.You can see the finished size over the thumbnail. The thumbnail will also show how many pages your poster will print onto. In the example below, this 8.5x11 inch poster will now be enlarged to print onto 6 pages:

I print larger if I am printing poster sized - especially with anchor charts. You will need to trim and tape the pages together. You may want to laminate the finished poster so it looks more uniform.
7. Fit to Space or Full Sized.
I always check the difference between fit to space and full size in a .pdf printer window.
Every printer is a bit different and you do not want to print a bunch of pages only to realize the edges were cut off!
8. Print Digital Classroom Decor onto Label Paper
I make my own stickers by printing name tags and labels on full sized label paper by Avery.(Click the affiliate link to see the product). That way I can cut around and have a custom sized sticker or label. I often use this tip when I am printing non standard labels for bins.
I hope this helps as you begin to decorate your classroom this year and are looking to purchase digital classroom decor! I like to mix some customized classroom decor with store-bought items for a unique theme that is easy to change out and adjust. All of the Emoji digital classroom decor sets pictured here plus more Emoji and iPad themed items not shown are available here.


WOW Erin! Thank you so much!!
ReplyDelete