Do you have students who struggle to understand the concept of addition? Are your students visual learners who need help with organization? This easy to make graphic will help students fully understand the concept of adding two sets together.
Showing posts with label Special Education. Show all posts
Understanding Addition With A Graphic Organizer
Do you have students who struggle to understand the concept of addition? Are your students visual learners who need help with organization? This easy to make graphic will help students fully understand the concept of adding two sets together.
Using Social Stories to Teach Skills
Using social stories to teach appropriate behavior, decrease anxiety and teach about social skills is a great way to shape behavior.
Social stories are a great way to teach about and shape behavior with students who need concepts broken down or simplified. Social stories generally have a lot of visuals to support learning and understanding. Teachers can target any topic or skill using social stories.
Why use social stories?
I have written and used social stories to target many different skills. For students who struggle with anxiety, social stories help prepare students for what is going to happen and what they should do in different situations. For students who engage in inappropriate behaviors, social stories are great for shaping or refining behavior to be more appropriate. My students have had great success learning new skills this way and so can yours! The best part....they are super easy to make and use!
Hands On Approach To Vocabulary
Hands on learning tasks are perfect for this time of year. The closer we get to New Year's Day, the more distracted our students become. Here are three ideas for teaching vocabulary through movement and interactive activities.
Once students have found all of the pictures, we do a group sorting activity. We use multiple pictures to illustrate the word. Using multiple images for a vocab word helps students be flexible in their thinking about a vocabulary word.
Hands On Learning In Autumn
Autumn is the perfect time of the year for hands on learning! There are so many great themes in the Autumn that naturally lead to hands on activities. By integrating hands on learning into our teaching, we can strengthen understanding of all the skills we are targeting.
Have you tried sensory bins in your classroom yet? Sensory bins rock! They easily get students engaged in learning. Who wouldn't want to put their hands in?! Nature gives you all the sensory bin supplies you need in the fall! Kids can't wait to get their hands into pine combs, pine needs, sticks, acorns, leaves, etc. Once the leaves dry up and get crumbly, add dried rice and beans to keep the sensory bucket going. You can easily integrate academic skills with the sensory bucket. In the picture below, students are finding cards containing different sets of fall items. After finding the pictures, the students have to match it to the number or a number line.
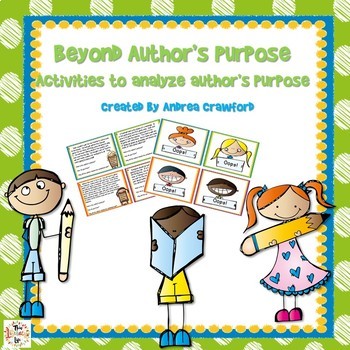
Autumn is also the perfect time to work on the food pyramid unit. Most of the fall holidays (Halloween, Thanksgiving, Christmas, Hanukkah, etc) have foods associated with them. During the fall, we work on trying new foods, doing taste tests & graphing the results, etc. A big hit with my kiddos is exploring the 5 senses with popcorn. We make a list of descriptive words that we can then use in our writing.
One of my all time favorite themes occurs in Autumn...Fire Safety! There are so many great ways to add movement and hands on learning during this unit. We practice concepts like "Get low and go!" and "Stop, drop and roll." Here we are practicing getting low. We pretended the blanket was smoke that we had to stay under. Through these kinds of activities, our students have a much better understanding of how to do it if they should ever be near a fire.
How do you add in hands on activities in your classroom?
Simple trick to reduce interruptions in the classroom
Let's face it...we all have had that student that feels driven to ask a million questions during a lesson. Sometimes those questions are relevant and sometimes they aren't. Here is a great trick to get students thinking about why they are asking questions and if they are important to ask at that time.
My son was THAT student in third grade! He has an auditory processing disorder which led to classroom anxiety. When he was anxious, he would raise his hand to ask a question. Yup, any question that happened to pop in his head at that time!! Yikes!!! The teacher and I worked together to develop this question card system.
These three cards were on his desk at all times. When we started the system he could ask 3 questions every hour, but then we were able to fade it down to 3 questions in the morning and 3 questions in the afternoon. About a month later he didn't even need the cards any more. He had learned why and when to ask a question and no longer needed the visual reminders.
It is a nice easy LOW PREP way to teach students to think before interrupting a lesson. Download this FREEBIE here.
Games for Student Engagement
Do you use learning games in your classroom? They are great for capturing and keeping students' attention. When we make learning fun, kids don't have to struggle to keep focused.
Games offer opportunities to add movement into the school day. Research suggests that getting students moving is vital to their minds and bodies. I love adding movement into our activities, especially into math.
Race to the number line is a favorite in my classroom. For this activity, we break up into 2 teams. The goal is to get all of the number cards and tens frames arranged in the correct order at the other side of the classroom the fastest. I call out different gross motor activities or movements that the students have to do as they bring the materials down to the other side of the room to complete the challenge. Students LOVE it and you can easily adapt it to whatever skill you are working on.
One of my favorite (non-motor) games to use in class is Language BINGO. There are so many different ways you can adapt this game to cover multiple skills at once. My students need a lot of practice on vocabulary, feature, function and class of items, so that is what we focus on.
The game cards come in different levels so I can easily hand out the appropriate cards to each group without any extra prep. The cards are self-checking, so students can run and play the game without help. This helps me have fun learning games going on while I pull students one on one or in small groups.
Click HERE for more information on the language BINGO games.
Have an idea for making learning fun? Leave a comment so we can all learn!
5 Great Tips for Co-Teaching Success
Hello! It's Nicole from Learning Lab again!
Here are some tips on how to make your co-teaching relationship a successful one!
It takes time to develop a rapport. Get to know your partner over the summer, if possible. Attend
trainings together. Go out for lunch and chat about your family, interests, likes, and dislikes. The trust
built over the summer will make the entire year run more smoothly.
Think about the general education teacher as the curriculum specialist. Chances are, they are more familiar with the grade-level curriculum and expectations. The special education teacher is the modifications expert. They will have great ideas of how to modify the classroom environment and assignments to fit the various needs of the classroom.
Each of you brings great things to the classroom. You each have different experiences and training
that has gotten you to this point in your career. You may be used to doing things differently than
before you started co-teaching. Just like in a marriage, your co-teaching relationship is a give and
take. You will learn a lot and gain a lot if you are open-minded.
Whether you share one space or you each have your own “home base”, it is important for both of
you to truly feel at home in each space. Within the main classroom, you each should have a desk or
other personal space. The classroom signs should include each of your names. My classroom signs
always include the names of both teachers, all of the teaching assistants,
and all of the related service providers that play an active role in our classroom. It is important for everybody to feel a part of the team. To avoid using the terms “my room” and “your room”, I named my assigned room the “Learning Lab” and refer to the co-teaching classroom as just our “Classroom”. When you split up into groups, it might be a good idea alternate which teacher leaves to use the other space.
Banish the phrases “your kids” and “my kids” and replace it with our kids. Both of you are equally
responsible for the students assigned to your classroom. Your students should not feel a sense of
belonging to one teacher over the other. When you split into groups or assist 1:1, alternate which
teacher works with the different levels of kids. The same goes for working with parents.
Communication should come from both of you.
Just like in a marriage, you need to appear to be united. You might not always agree with the other
teacher, but it is important to put on a united front and then speak about those differences in
private. You always need to back each other up and also support your paraprofessionals as well.
Your students will pick up on any disconnect between you and will try to use that to their advantage.
Always speak positively about your partner. You need to work together for at least the entire
school year so your relationship needs to be strong. The staff lunch room is not a place to talk
about your issues. If you do not have anything nice to say, do not say anything at all.
A few years ago, a friend of mine was having some trouble within her classroom. Her team of paraprofessionals were disjointed and often went against each other in front of the students. She reached out for some advice and it inspired me to create a product geared towards helping classrooms with multiple adults to work together collaboratively in harmony. I have found it quite useful in my own classroom which has four paraprofessionals.
Whether you are new to co-teaching, new
to your partner, or have been paired up for years, I hope you find
this these tips helpful.
If you want more information about co-teaching, you can find just about everything you need in my Ultimate Co-Teaching Start-Up Kit.
Thank you for stopping by Classroom Tested Resources today! For more ideas, stop by my blog, Learning Lab, or follow me on Instagram (@Learning_Lab). Instagram is my favorite way to share quick ideas!
See you again next month!
Prepare for Better Learning!
Hi all! It's Pam from Mrs. P's Specialties here to talk to you about preparing your schedule for better student engagement.
There are lots of great articles and statistics on why it is imperative that kiddos are allowed to move more in school. Click HERE for an article from the Washington Post about the rise in attention problems in students.
As teachers, we can make small tweaks to our schedules to give students the movement they developmentally need. Through careful planning and scheduling, we can meet our students developmental needs & reduce behaviors and interruptions in our classrooms. Did I mention that your day will be more fun?! WIN!
There are activities and subjects that we have to plan and do at specific times of the day, so I focus on the times between set in stone activities. In my classroom, my students are engaged and on task more when I alternate movement and non-movement tasks. For example, I do direct teaching for an hour straight. By the end of the period my kiddos NEED to move, so I schedule snack or centers afterwards.
For some classes, just the moving that comes along with moving to a new area of the room is enough for students. That is rarely the case in my room. To meet the needs of my students I look for ways to adapt academic activities and add in moving. One of my class' favorite math centers is bowling for subtraction.
Other ideas for adding movement into your day:
*Have students do a gross motor move to get into line. For example, "If you are wearing blue, jump like a kangaroo over to the door (or line)."
*Brain breaks
*Use over-sized materials so students need to move their bodies to manage materials.
I hope you have gotten some ideas on how to add movement into your classroom. Do you have an idea about adding movement? We would love it if you left it in the comments so we can all learn!
Moving Beyond Sounding Out Words
Hey everyone!
It's Pam from Mrs. P's Specialties to bring you some ideas about helping students move from individual sounds to fluently blending and reading words.
In my class we work on reading "smoothly".
Instead of talking about becoming fluent readers we moved to using the phrase, "smooth readers". This change in wording helped give my students a picture of what they were striving for.
We practice reading smoothly multiple times a day. Many times we use these quick fluency strips for practice. It helps students who easily become overwhelmed.
To begin with, we build off and review word families.
We also use this strip to talk about rhyming and word families. I generally give a verbal direction on how to mark up the sentence. For example, here I directed the student to underline all of the -at word family words.
I hope you have gotten some tips on how to work on fluency quickly.
In my class we work on reading "smoothly".
Smooth readers
*Read at a steady pace and do not pause over and over.
*Read a whole sentence at a time. They don't reread words over and over.
*Are easy to listen to read to and understand.
Instead of talking about becoming fluent readers we moved to using the phrase, "smooth readers". This change in wording helped give my students a picture of what they were striving for.
We practice reading smoothly multiple times a day. Many times we use these quick fluency strips for practice. It helps students who easily become overwhelmed.
To begin with, we build off and review word families.
Then we move on to sentences- again in small strips to make it manageable for the students.
After 2 to 3 readings of this strip we then talk about what every sentence has....a capital at the start and a period (or other punctuation) at the end. Students then add the proper punctuation.
This whole session lasted 5 minutes or less, but we were able to work on tons of skills. We worked on fluency, word families, sentence basics, and following verbal directions. Nothing better than quick meaningful instruction!
Here are some of the other Word Family Fluency Strips students worked on during this time.
Multi-Sensory Learning & A Freebie!
15 April 2015
/
Engagement,
Learning styles,
Planning,
Plants,
Special Education,
Spring
/
5 comments
Hi there! I'm Pam from Mrs. P' Specialties and I am super excited to be part of this collaborative blog. I really like that we all come from slightly different backgrounds and settings. Being able to draw from a variety of resources and ideas is so helpful!
Read More...
Whether you are in a special education classroom like me or a regular education setting, we are faced with teaching to a group of students with different learning styles. This is where the multi-sensory approach to teaching becomes vital. Here are some of the types of lessons I do for our plant unit to meet the learning styles in my classroom.
In addition to the more traditional plant units, we also add in a lot of hands on activities. We explore seeds by talking about the different parts of a seed.
After taking apart the seed and discussing what happens to the seed as it grows, we got up out of our seats to act out the process. We crouched down, opened our arms like the seed coat opening, wiggled our toes as the roots grew and then started to very slowly stand up as the stem and flower grew bigger and bigger. The class loved it and everyone could take you through the steps!
To add a sensory component, I hid parts of our plant posters in the sensory bucket. Students had to find the different parts of the plant posters and reassemble the posters using their knowledge of plants.
Using playdough mats, students had to use different colored playdough to make and tell about the plant parts.
Click HERE to grab a FREE copy of the playdough mat.
Lastly, we teach pollination using glitter. First, we sprinkle glitter on one large laminated flower. We explain how bees pollinate as they move from flower to flower spreading the pollen that sticks to them. To show them with the glitter, we pretend our hands are bees and pick up a tiny bit of glitter from the first flower. As our hands land on the second flower, a bit of glitter drops. I would love to take credit for this great idea, but I adapted the idea from this pin to better fit my students.
I hope you have gained some new ways to meet the different learning styles of your students. Thanks for stopping by!
Powered by Blogger.