Showing posts with label Organization. Show all posts
Showing posts with label Organization. Show all posts
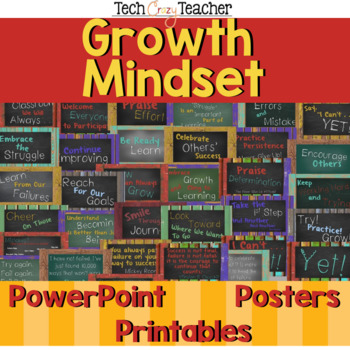
7 Uses for Colored Dot Stickers
5 Practical Ideas to Help YOU Avoid Teacher Burnout!
16 January 2017
/
Burke's Special Kids,
Organization,
Teacher Burnout,
Time-Saving Ideas
/
1 comment

DIY Classroom Organizing Tips & Tricks

I use yarn for a lot of different things in the classroom and I have tried a few different techniques for trying to keep the yarn from becoming either a tangled mess, or an unraveled nightmare that would delight my baby kitty. I just recently made a trip to our local recycled supply store (also known as teacher heaven) and stumbled across this genius trick. I love that it also happens to be a great reuse of my Kirkland Mixed Nuts containers that I have always saved, but never quite known what for! Now I do!

1 good size plastic container with a lid
1 power drill with a 1/2 inch bit
I had Dad2punkerdoo help me with the drill, because he's just really good with that kind of stuff. He made sure the lid was screwed tightly on the container, eyeballed the center, and then in about 3 seconds drilled a perfectly sized hole. I simply placed my yarn inside, threaded the end through the hole, and ta-da...there you have it! A simple DIY solution for keeping your yarn from becoming a mess.

I have got a few other organizing tips and tricks posted over on Mom2punkerdoo click on the links below to read more!
 |
| Click for more ideas and a FREEBIE |
 |
| Click for a few more fun ideas and a DIY basket! |
Be sure to check out my classroom organization board on Pinterest for many more useful ideas to getting your classroom organized!

DIY Personalized Photo Desktop Organizer
Do you want to learn how to create your own
personalized photo desktop organizer?
Hey, friends! It's Beth from Adventures of a Schoolmarm, and I have to let you in on a little secret. I can't stand a messy computer desktop! I also love being able to have a personalized photo on my desktop because I am picture obsessed. I started using a custom desktop organizer a couple years ago to help me stay organized and have easy access to my files. If you want to learn how to create your own custom desktop using a meaningful photo, this tutorial is for you!
Understanding Addition With A Graphic Organizer

Do you have students who struggle to understand the concept of addition? Are your students visual learners who need help with organization? This easy to make graphic will help students fully understand the concept of adding two sets together.
Thanksgiving Snapshots!
Ahhhh, Vacation! I love spending time with family and having a jam packed schedule of fun activities or absolutely no plans at all (my favorite)! This year, I spent most of my Thanksgiving on the road! Lots of driving up and down I-5! But it was great to be with my family and enjoy seeing all the cousins together.
I needed this break more than any year in recent memory! Yes, it's been one of those years in the classroom. Don't get me wrong! I love my students! Each one, individually, is sweet and wonderful, but when all 22 get together I feel like a first year teacher, all over again! :)

We all know that after the week away from school, we need to head back into the classroom with a good game plan! How do you plan on harnessing all that energy and actually teach? Here are 5 tips for harnessing your students energy and putting the focus on learning!
Read More...
I needed this break more than any year in recent memory! Yes, it's been one of those years in the classroom. Don't get me wrong! I love my students! Each one, individually, is sweet and wonderful, but when all 22 get together I feel like a first year teacher, all over again! :)

We all know that after the week away from school, we need to head back into the classroom with a good game plan! How do you plan on harnessing all that energy and actually teach? Here are 5 tips for harnessing your students energy and putting the focus on learning!
Teacher Tips for Task Cards with Links to FREEBIES

I love using
task cards in the classroom. I think
they are a fun way to keep learners engaged.
Task cards are a great option for learners who are easily overwhelmed by
a full page of work. When this work is
presented in task card format the work is more manageable for these learners.
Task cards come in a variety of formats. They can be used in centers, for early finisher work, and for take home practice. I like clip cards that allow little learners to develop fine motor control while addressing academic skills. I love task cards that get learners up and moving about for “Round the Room” and SCOOT activities.
There are
many good things to list about task cards.
Once you have them prepared, they can be used year after year. They can be used to save paper. Kids love them. They are a refreshing alternative to worksheets.
As with most anything, there are a couple of not
so good things about task cards. Preparing them and storing them can be a
challenge. I hope these tips will help
make that task easier for you.
Task Card Preparation
Tips
Before
printing your task cards decide if they should be printed on card stock or copy
paper. How much wear and tear will be
involved? Will little learners be
handling the cards and attaching clothespins?
Are you making the cards self-checking by marking an answer on the back of
the card that will show through on plain copy paper? Printing on card stock is the best option for
these situations. If you are hanging the
card for a Round the Room activity, it likely will get very little wear and
tear. In that case, regular copy paper
will work well.
Are you
printing in color or grayscale? My
favorite option is printing in color, but that can get quite expensive. Some task cards can be printed in grayscale on
colored paper or colored cardstock saving your color ink for later. Graphics with crisp lines and few shading
details work well for grayscale printing.
There are some cases where printing in color is mandatory for the task
involved. If an individual learner needs
considerable practice on a particular skill, I print a set of cards in
gray scale and send it home for the family to keep. You can look over your task
card design and format to decide which printing option works best.

Cutting out
task cards can be time consuming. If the
cards have a straight edge, using a paper cutter is a great time saver. I have had several paper cutters, but the one
in this picture has been my favorite. It
is compact, lightweight, and sharp! (Yes, I have accidentally touched the blade
a couple of times. I can attest that it
will draw blood.) I have used this
cutter for a couple of years. It still cuts without tearing or chewing up my
cards.
The picture
above shows using the paper cutter to cut a FREE Spell the Room Resource.
Managing and Storing
Task Cards

I like to
use various containers for clip cards and clips. I find cute, fun, and practical containers at
dollar stores, WalMart, and the Target Dollar Spot. I also upcycle containers from gifts I have
received. After I have enjoyed that
delicious homemade fudge for Christmas or cookies for Halloween, I can still use the
container for clip card activities.

The picture above
shows clips and cards from a FREE Count and Clip resource stored in
a Candy Corn themed cardboard container from the dollar store.

Pictured
above are clips and cards from a counting resource used with a basket that was first
used as a fruit basket.

Zippered
supply pouches are great for storing cards and clips. I love this idea for making early finisher
activities. Using the pouches also makes a portable activity that children can take
home for extra practice.
The picture above
shows a FREE clip card resource in a zippered pouch.

Here is an
option to help you save paper and keep your copy count low.
I like to
put the task cards in a dollar store photo album and use dry erase markers to make a
write-on/wipe-off activity. Use
inexpensive black gloves as erasers. The glove in the picture above came from the ladies accessories department at WalMart, but they
work well for children. Kids love using them, too.
I like that putting the gloves on gives little
learners an additional opportunity for motor development. In many areas of the country children have
little experience with gloves. Using the
gloves allows little learners in warmer climates an opportunity to learn to put
on gloves.
Pictured above
are cards from a FREE Add the Room resource used in a photo album.

Here is another
paper saving way to use task cards.
Instead of printing and
copying response pages, allow your
learners to record their responses in their journals. Journals can also
be used to record responses for Round the Room activities such as Count the
Room, Spell the Room, Add the Room, etc.
The picture
above shows using a journal to record responses for a FREE addition clip card
resource.

Storing task
cards until they are needed next year can be challenging. I found it particularly difficult when
storing cards and original copies of the response page. Storing cards in a file box and response pages
in a file folder was aggravating to me. That seemed to double the time spent
pulling the resources for use and then refiling them after I had used them. I wanted a way to store them together.
Storing the
response page and cards together in plastic page protector sleeves allows you
to store them together. The sleeves are
kept in a binder. The activities can be further organized
by use of binder dividers. You can
organize them by subject, skill, month, etc.
Pictured
above is a FREE Add the Room resource stored in a plastic sleeve in a binder.
I hope these
tips help make using task cards in your class room more enjoyable for you and
your learners.
Until next
month,